Tuesday 11 October 2022

Cauliflower Pickles

Here is my recipe for that old classic, Cauliflower Pickles, I particularly love these matched with cheese, and on sandwiches and toasties. 

I started with my mother in law's recipe, but realised quickly I hadn't written it down correctly, so researched a few others to come up with this hybrid. They came out beautifully so I'm archiving it here for the next time I want to make them. (Which, with the way they are being devoured, will be quite soon!)

I use my MagiMix to slice the onions quickly and tearlessly! The cauliflower is easily crumbled into small florets. My preference is for Apple Cider Vinegar, which is more mellow than straight White Pickling Vinegar, but either will do and I like the addition of some Malt Vinegar which I saw on one recipe so I've included it here.

My sterilising method is jars and lids submerged in a large stock pot of water, bring it to the boil and boil for twenty minutes. Jar pickles while hot. 

Cauliflower Pickles

Ingredients

2 cauliflowers cut up small into florets

3 onions chopped

water

1/2 cup salt

4 cups vinegar (3 cups apple cider or white, one of malt)

2 cups sugar


spice paste

2 tsp turmeric

2 tsp curry powder

1 tsp mustard powder

1 tsp cayenne pepper

1/2 tsp cinnamon

1/3 cup cornflour

1/2 cup water


Method


Add cauliflower and onions to large pot. Cover with water and 1/2 cup salt and leave overnight.


Next day rinse the cauliflower and return to pot.


Add vinegar and sugar, mix through and bring to a simmer.


Simmer 15-20 mins till onion is transparent and veggies almost cooked.


Mix spices with cornflour. Add water and blend.


Add to vegie mixture and cook for 5 mins or until thickened. 


Spoon into sterilised jars.

Wednesday 31 January 2018

Simple Seedy Crackers

Seed CrackersSeed crackersSeed crackers
Seed crackers

I can't believe how simple and quick these crackers are.

And they are delicious.

Even better when I found this recipe I had all the ingredients in my pantry, courtesy my home made granola ingredient store.

The good news too is they have no extra oil added or flour or sugar, so they are really and healthy and a good choice for those with allergies and intolerances such as flour, nuts or soy.

Recipe

1/2 cup chia seeds
1/2 cup sesame seeds
1/2 cup pepitas
1/2 cup sunflower seeds
1 Tbsp flax/linseed
1 Tbsp poppy seeds
1 cup water
1 clove garlic
1/2 tsp salt

Mix dry ingredients (including garlic) together in a bowl and then add water.
Stir and then leave to sit for two minutes while the chia seeds absorb the water.
This will bind the mixture.

Transfer mixture to baking sheets lined with non stick baking paper.

Thin out to 1/4 inch or thinner even thickness and then score with pizza cutter or knife into cracker shapes.

Cook at 160 degrees Celcius for 30 minutes. Take them out and flip them over to cook the bottoms, about ten minutes, until they're crisp and golden.

So simple, so delicious. I'm going to experiment more with these and try some flavourings, I read somewhere about including japanese kelp flakes, and we have sushi seasoning packs which would be delicious in these, or perhaps some chilli flakes, paprika, italian herbs... the possibilities are endless. I might add a bit more garlic on my next try too.

I've adapted my version of the recipe from this one here: by adding some other seeds I had on hand.

Wednesday 30 November 2016

candle making

#candlemaking#candlemakingSoy waxMy creation#candlemaking#candlemaking#candlemaking#candlemaking#candlemaking#candlemaking

A while ago I got an email from Tim at Crafty Candle Supplies asking if I wanted to have a play with their products. As a craft tragic and candle lover the answer was a big yes!

Candlemaking has been on my craft wish list for a while but its one of those things that seem a bit tricky, a specialised craft with specialised equipment so I've never got round to it.

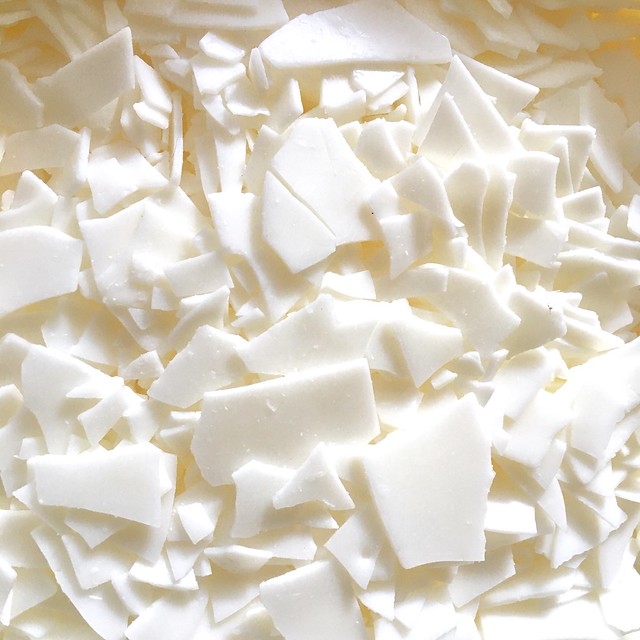
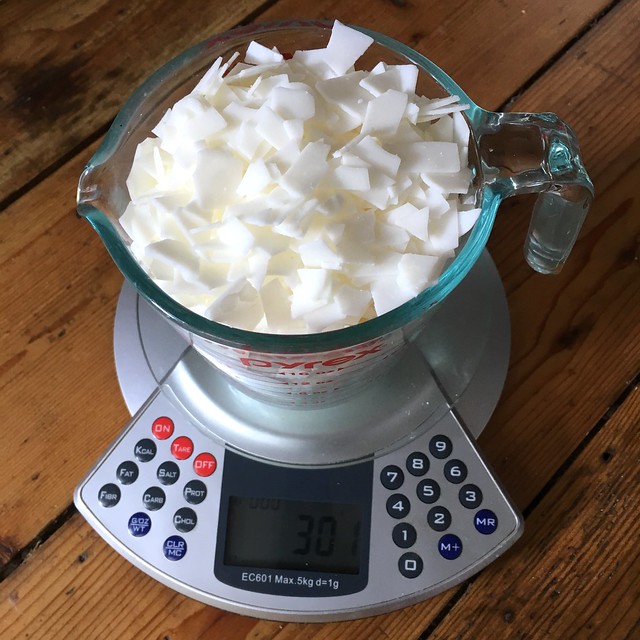
I've just poured my second set of candles though and the good news is its so easy, especially with a kit. I managed to melt up some wax, use two different fragrances and some colour and I poured five little vessels in under an hour.

It helped that Crafty have simple 
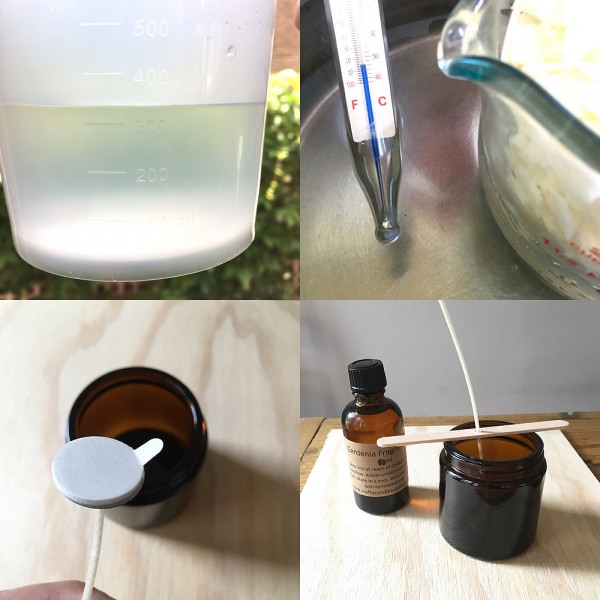
candle guides on their website, but really, this is a craft you can enjoy with no previous experience. And the highest temperature the wax gets to is 80 degrees celsius which is cooler than boiling water.

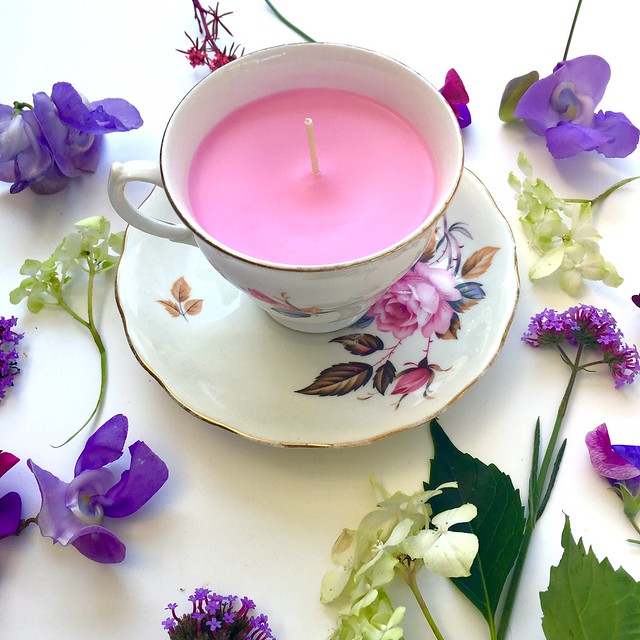
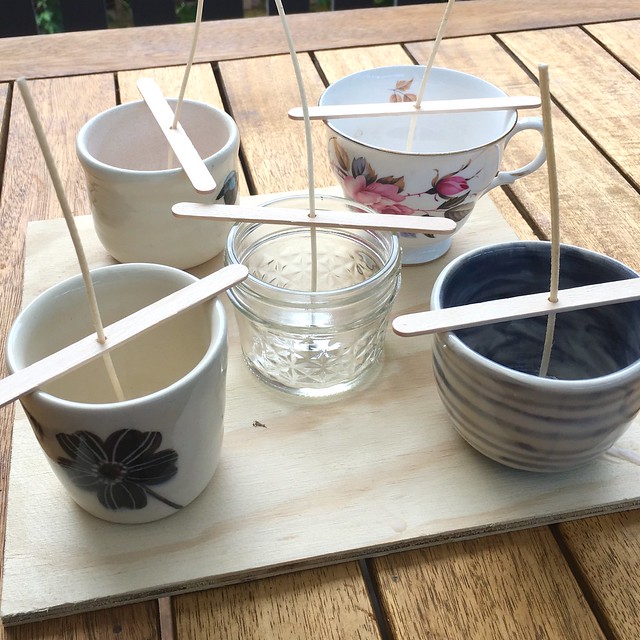
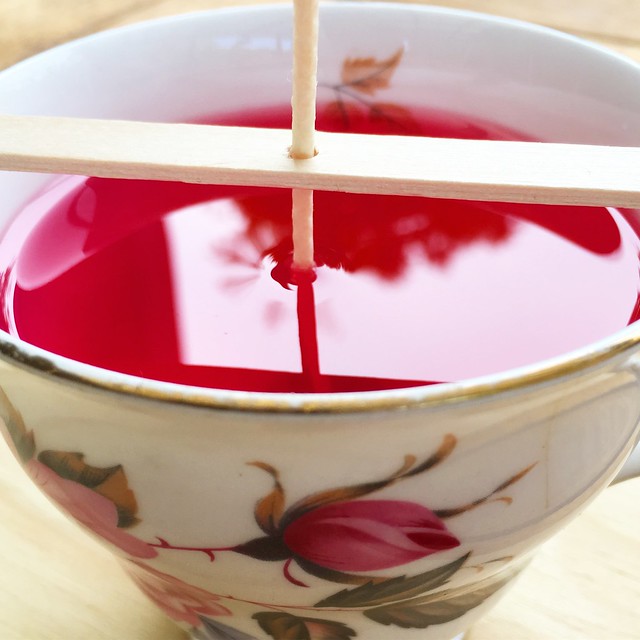
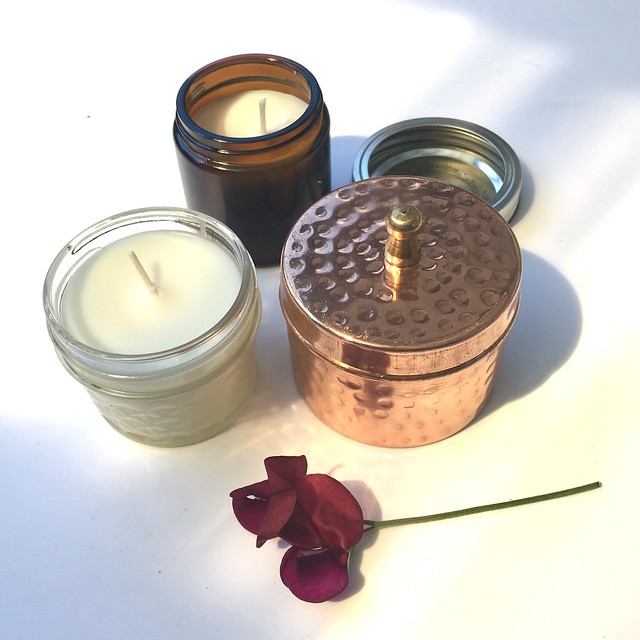
I was sent a small selection of specialised candle vessels - mason jar, hammered copper tin, and some amber glass lidded jars. I also bought some vintage tea cups at the op shop, I've seen these used for candles before. Its a nice new life for these and the slight chips or staining aren't as important and often hidden by wax. In fact the op shop is a perfect place to find unique and original candle holders, just make sure they are heat proof and sealed.

I also used some flowerpress ceramics which are fully glazed inside and out, I want to give these as gifts and I love the idea that after the candle burns you can rinse out the pot and use it for other things, a gift that gives twice!

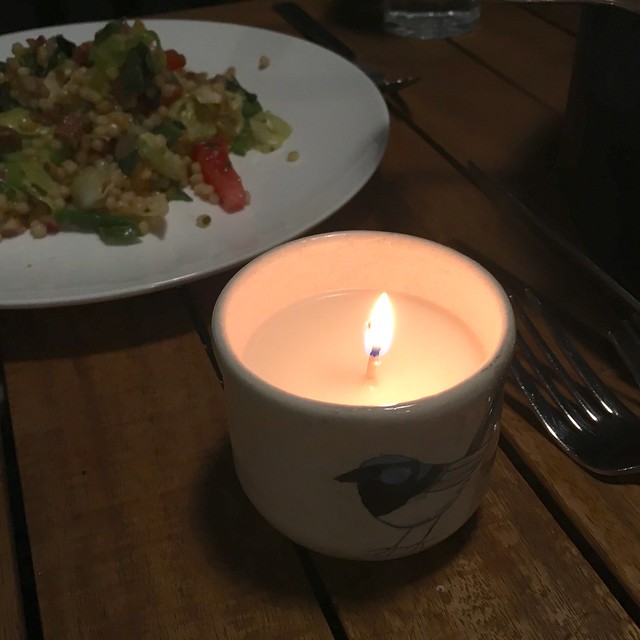
Making your own candles is great for gift giving, perfect for this time of year, and the wax is set within 24 hours so you don't have to plan too far ahead.

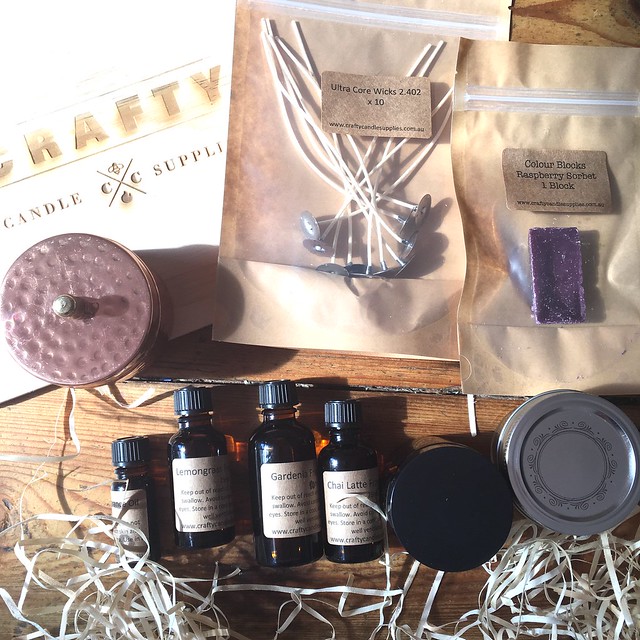
I have my eye on some of Crafty Candle sets for Christmas. I love the way its a one stop shop and the wooden boxes are great for presentation and storage. I used the lid to set up the wax containers as it didn't matter if I got wax on it. The wax is pretty easy clean though and washes off in hot water.

The only hard part is choosing from the fragrances... I do love a smelly candle!

Luckily on my last candle making try I realised that I could melt all the wax in one go but add fragrances individually, as long as I wrote down the measurements of each pot so I knew how much to decant and add scent to. And also I needed to rinse the scented wax from the pouring jug before adding more.

My other advice is to check the flash point for fragrances before you start so you have that information in hand. This refers to the perfect temperature to add fragrance to the hot wax and varies for different scents.

I wrote out my notes on the whole process so I wasn't looking it up online during the making, you could easily print it out also. Different containers take different wicks and these are easily attached using wick stickums, a double sided tape that fits onto the wick base perfectly.

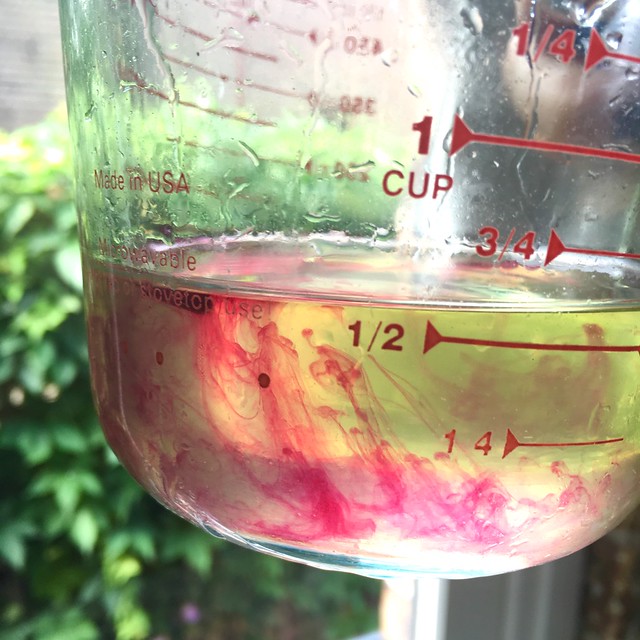
On my second try I coloured some wax. The colour block I used was so pretty and as you can see a small piece added to the melting wax gave my teacup a beautiful pink colour, which matched the pattern perfectly!

All in all I found candlemaking a simple and rewarding craft I'm going to enjoy experimenting more!